Epson Printer Installation Guide - Smooth Setup
Learn How to Install Epson Printer: Windows & Mac OS
Installing an Epson printer may seem daunting at first, but with the right guidance, it’s a straightforward process. In this comprehensive guide, we’ll walk you through every step to ensure a seamless printer installation. Whether you’re setting up a new printer or reconnecting an existing one, our expert advice will help you get the job done quickly and efficiently.
Follow the Steps: Epson Printer Driver Download & Installation
Follow the steps below to download printer driver on your desktop.
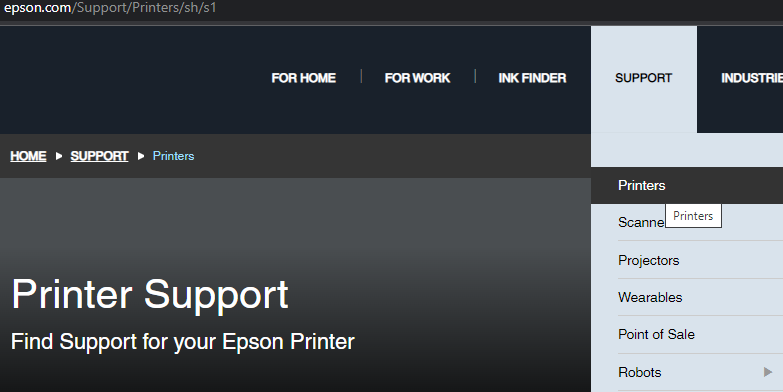
- Open the Epson driver download page from Epson driver website.
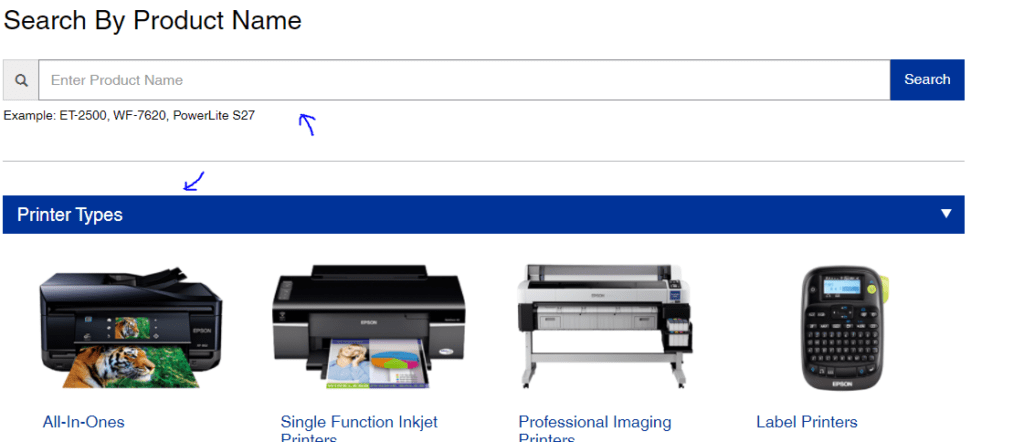
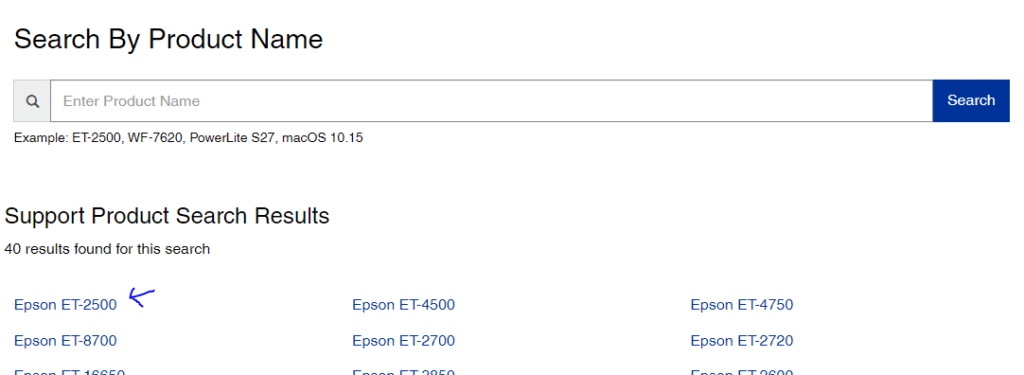
- Enter the product name or product number in the ‘Find your model’ field and click ‘Search’ button or select the desired model name from the list of printers.
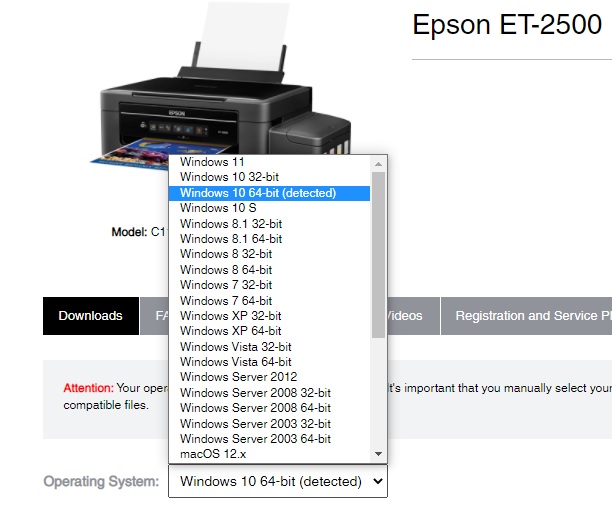
- If you click the printer model name in the next step, it will take you to the next page where you need to select the operating system (Windows or MAC).
- Next, you can select and download Epson printer drivers for your model here.
- Now, after getting downloaded, it will be automatically saved in the download folder of your computer.
Next, go to the next section to Install Epson printer driver after completed the downloading driver process.
Follow the Step - Install Epson Printer Driver for Windows 10/11
In order for Epson printer installation, follow the instructions below :
- Firstly, open the installed driver package which you just downloaded.
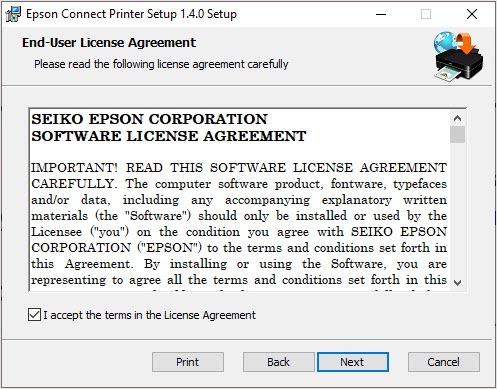
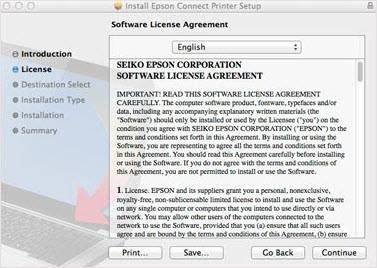
- Then, accept the ‘End-User License Agreement’, and click on ‘Next’.
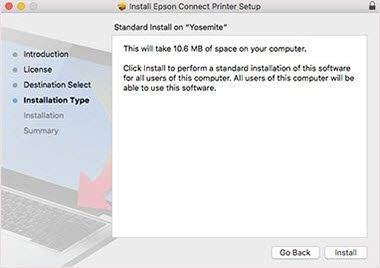
- Then, click on ‘Install option.
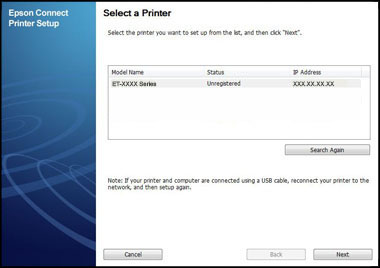
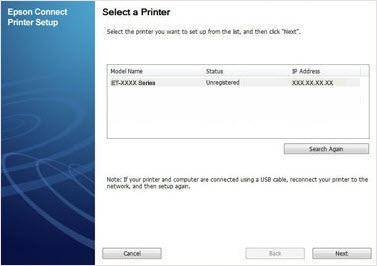
- Now, choose your product from the menu and click ‘Next’.
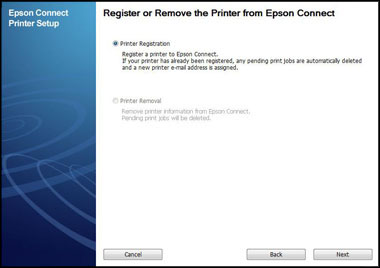
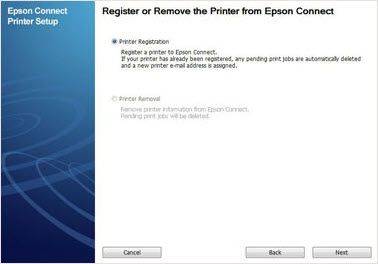
- Thereafter, select ‘Printer Registration’ and click ‘Next’.
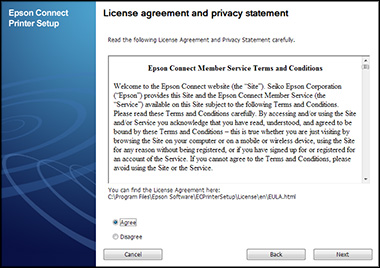
- Click Agree > select Next.
- Hit ‘OK’ once you see ‘Register a printer to Epson Connect’ option.
- Do one of the following:
- If you’re creating a new account, fill out the form to create an ‘Epson Connect Account’.
- If you’re registering a new product with an existing account, select ‘I already have an account’ option and fill out the ‘Add a new printer’ form and then click on ‘Add’.
- Lastly, click on Close.
Finally, the Epson printer driver installation has successfully been completed now. Furthermore, you can move to the next section to add on your printer on Windows or Mac operating system.
Follow the Step - How to Install Epson Printer Driver for MAC
- Power on the printer.
- Once you have download the software as followed by above procces, now its time to install the Mac version of the Printer Setup Utility.
- Click on ‘Continue.’
- Proceed by clicking ‘Continue’ and then ‘Agree.’
- Select ‘Install’ followed by ‘Close.’
- Choose your printer and click ‘Next.’
Remarks: If no window appears, you can install the Epson Printer by accessing Finder > Application > Epson Software > Epson Connect Printer Setup.
- Opt for ‘Printer Registration’ and then click ‘Next’ > ‘OK.’
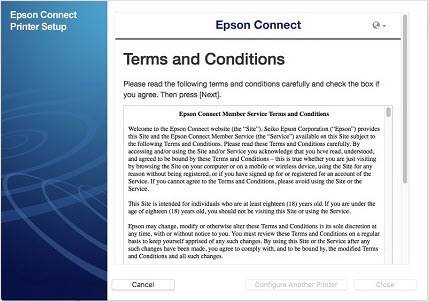
- Scroll down the content and check the ‘I accept the Terms and Conditions’ box, then click ‘Next.’
- You have the option to create a new account or log in using an existing one.
- Finally, click ‘Close.’
Simple Steps to Add Epson Printer on Windows and MAC
fter completing the installation process for your Epson printer, proceed with the steps to add the printer for both Windows and Mac users.
Steps for Windows :
- First, ensure that your printer and PC are connected with same Wifi network. For detailed instruction on it, visit “How to Connect Epson printer to Wifi” guide.
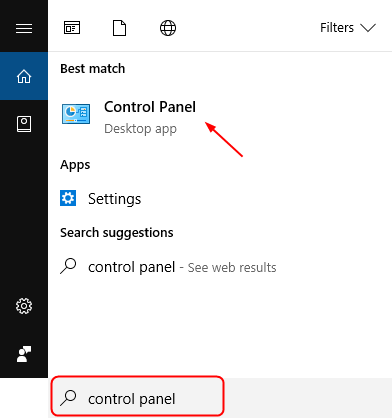
- Now, open the ‘Control Panel’ by using Windows search option.
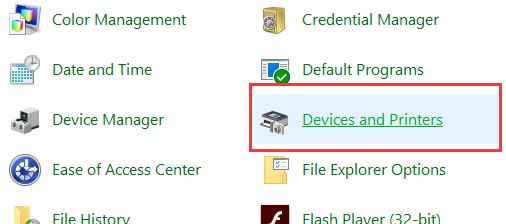
- Click on ‘Devices and Printers’ option.
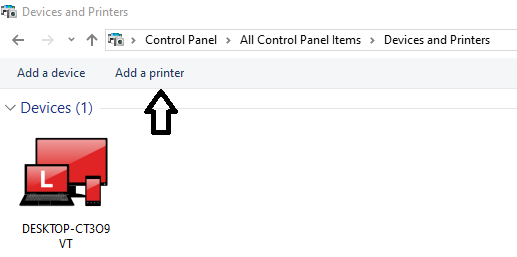
- Thereafter, check on the next window if your printer is listed or not. In case if printer is not listed, click on ‘Add Printer’ option.
- Select your printer model from the next appearing window and press enter .
- Wait for few moments and your printer will be added in the ‘Devices and Printers’ section.
Finally your printer has been successfully added in your Windows PC.
Steps for MAC :
Follow these steps to add printer on your MAC OS.
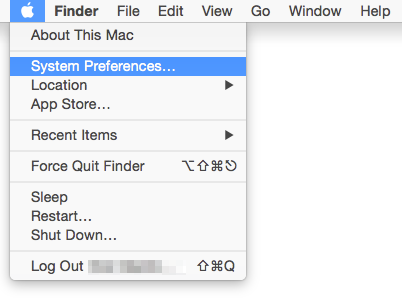
- Go to the ‘Apple’ menu
- Select ‘System and Preference’.
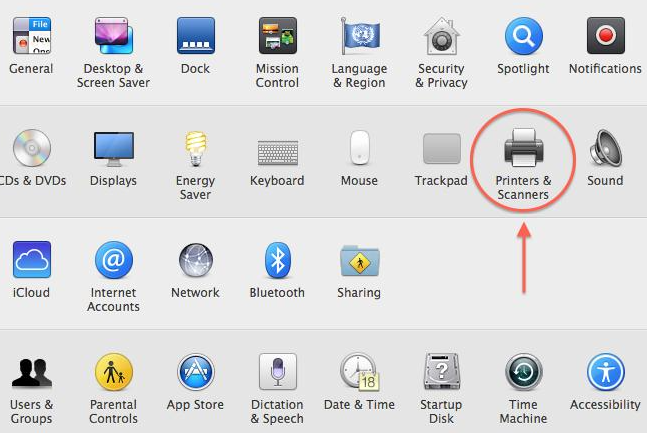
- Click on the ‘Printers and Scanners’ option.
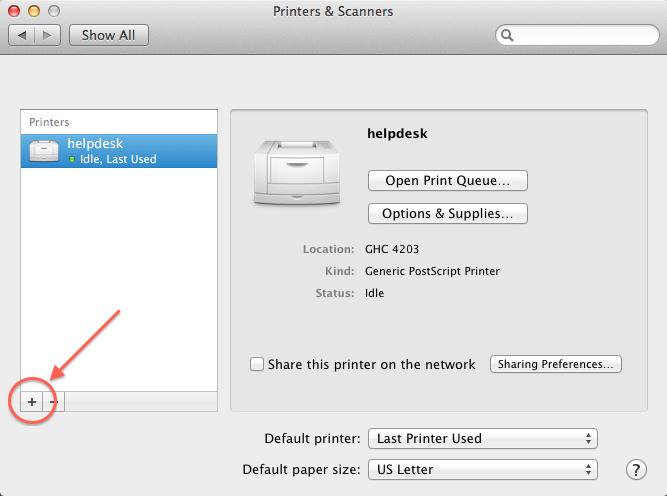
- Then, click on the ‘+’ sign from the next screen.
- Select your printer model from the Drop-Down list and press Enter.
- Thereafter, your printer will be successfully added and it will be visible with a Green mark on it.
Follow the Step - Update Your Epson Printer Driver
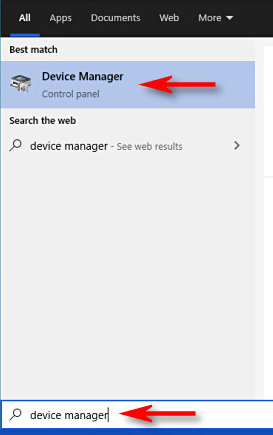
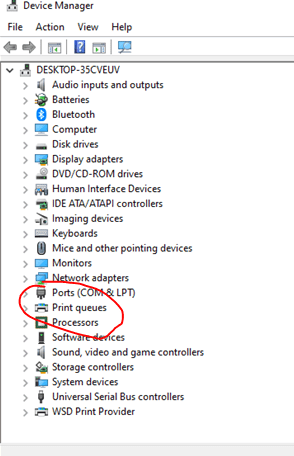
- From the windows search, type “Device Manager” to open the Device Manager window.
- In the Device Manager window, locate and expand the “Printers” or “Print queues” category.
- Look for your Epson printer listed under the expanded Printers category. It might be displayed with its model name or as an unknown device.
- Right-click on your Epson printer’s name or the unknown device related to your printer > select “Update Driver” to initiate the driver update process.
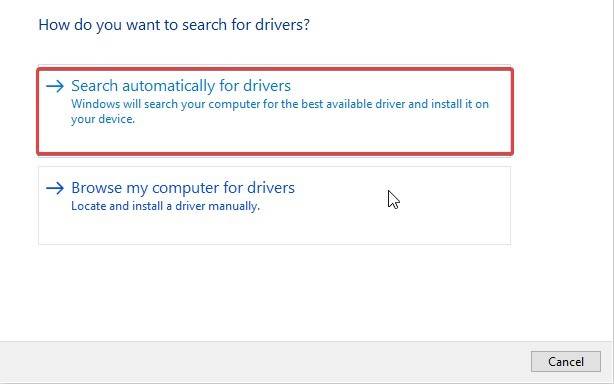
- A new window will appear, providing options to update the driver automatically or manually.
- Select “Search automatically for updated driver software.” This allows Windows to search and install the latest Epson printer driver available online.
- Windows will start searching for the updated driver software. Follow any on-screen prompts or instructions to complete the driver update process.
- Once the driver update is finished, restart your computer to ensure the changes take effect.
Frequently Asked Questions
This can be caused by a faulty USB cable, bad interface card on the printer, improper interface type selected in the printer settings or having the wrong driver installed on the computer.
The easiest fix for this is to check the drivers. Moreover, try uninstalling the current driver, and download and install the correct printer driver.
Most printers require that you download & install the latest Epson printer driver so that the printer will work well. If you recently upgraded from an earlier version of Windows, your printer driver might work with the previous version but might not work well or at all with Windows 10.
Visit the official Epson website and navigate to the “Support” or “Downloads” section. Enter your printer model, and you’ll find the latest Epson printer installer available for download.
Yes, you can install your Epson printer on multiple computers, either through a USB connection or by connecting them to the same Wi-Fi network.
It’s a good practice to clean the printer heads whenever you notice a decline in print quality. You can usually find the cleaning option in your printer settings.
If your printer model is not listed, try connecting using a different USB port, ensure the printer is powered on and recognized by your computer. If the issue persists, download drivers specific to your printer model from Epson’s official website.
Conclusion:
Congratulations! You’ve successfully installed your Epson printer. We hope this guide has been informative and helpful throughout the downloading process on windows and MAC OS. If you encounter any issues or have further questions, refer to the FAQs or reach out to Epson’s customer support for assistance.
Remarks– This is not Epson’s official page and information provided here is for your knowledge purpose only. For our complete disclaimer visit out Disclaimer Page.
