Canon pixma mx492 setup wirelessly
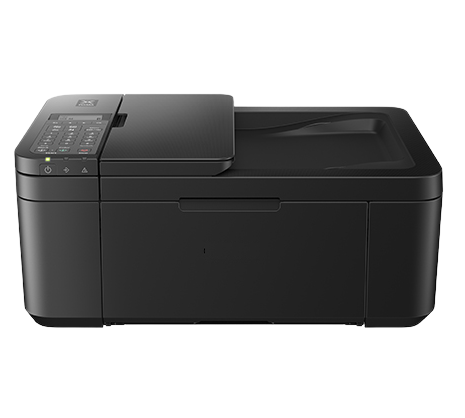
Canon Pixma MX492 Wireless Printer Setup on Windows & MAC OS
Wireless Setup With Canon Pixma MX492 Printer
In this article, we have explained the basic and easy to setup process of Canon pixma MX492 printer setup for Windows and Mac OS.
Firstly, you must know how to setup Canon MX492 printer with WiFi network. The requirements for it are mentioned as below-
- Wireless Router
- Windows or Mac desktop computer or laptop
- Working & reliable network connection
Once you are ready with the above mentioned things, you can proceed with the process of Canon MX492 wireless setup
Compatible Driver For Your Printer
Canon Pixma MX492 Wireless Setup - Connect with Router
Follow the instruction as given below for Canon Pixma MX492 wireless setup –
- Firstly, switch on your printer and close all unwanted applications.
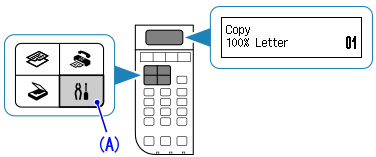
- Now, go to to the Menu option on your printer and tap the Setup Option (A) on the printer.
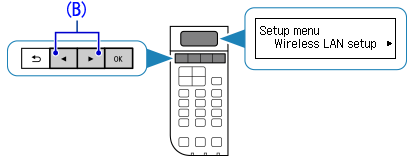
- Use the Triangle left/right arrow (B) on the screen Select Wireless LAN Setup > then tap OK button.
- Next, Select Other Setup Option and click on OK button.
- Now, Select the Cable-less setup and Hit OK
- Next, it will ask for your network key. Here you need to input your key (WiFi credentials) and press on OK.
- Finally, now your Canon Pixma MX492 printer is successfully connected with wireless network.
In the next section, you can check the process for Canon mx492 wireless setup for Windows & Mac operating system along with its driver installation and setup instructions.
Canon Pixma MX492 Wireless Setup on Windows OS
Before starting with driver installation, ensure that your computer and printer must be connected on the same WiFi network (steps explained in previous section).
Follow the given instructions to connect your printer to your Windows PC-
- Firstly, make sure that your printer, PC and router is turned ON.
- Now, connect printer with your WiFi Network by following the steps given in last section.
- Thereafter, go Canon’s website to download the printer driver.
- Once it download, double click on the file and finish the installation process
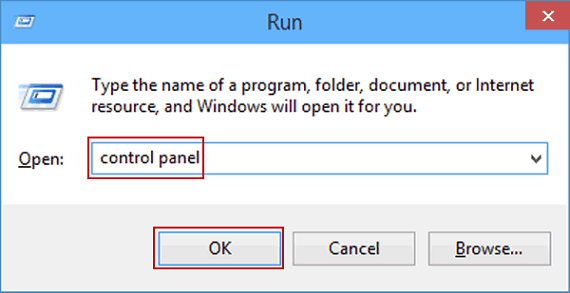
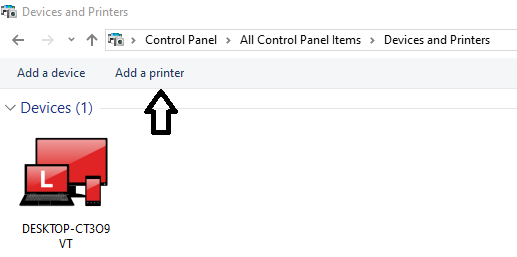
- Further, open your ‘Control panel’ from Run box (can be opened by pressing ‘Windows’ key + ‘R’ key).
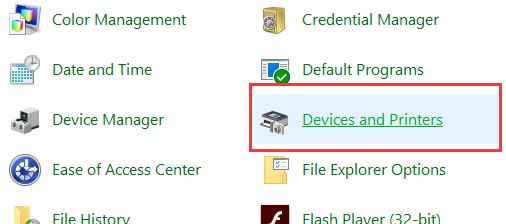
- Once control panel opens, click on Devices and Printers’.
- Now, from the next page, click on ‘Add Printer’ option.
- Thereafter, from the list of available printers, select your Canon mx492 printer and wait for few second.
- Now, finally your Canon mx492 printer will be display in the ‘Device and Printer section with a Green check mark.
- Hence, your canon pixma mx492 wireless setup process is now done for your Windows PC. You may now take a test print.
Steps For Wired Connection
For the wired connection, you don’t need to connect printer with WiFi network. Just follow these steps –
- Firstly, turn on your printer and Windows PC
- Connect your printer and PC with the USB cable.
- Next, press Windows + R to open ‘Run’ box. Then, type in ‘Control Panel’ and press on ‘OK’.
- Now, go to ‘Devices and Printers’ option and select “Add printer’.
- Here, select your Canon printer from the list of shown printers.
- Thereafter, wait for few seconds and your printer installation will be completed.
Canon Pixma MX492 Wireless Setup For MAC OS
Follow the steps described below to setup wireless connection of Canon mx492 printer on Mac OS.
- As for the first step, turn on your Mac PC, printer and router.
- Then, connect printer with WiFi network (steps already mentioned in this article).
- Further, Open Canon’s website and download the driver for your compatible Mac OS.
- Then, double click on the downloaded .dmg to open it and complete the installation of driver.
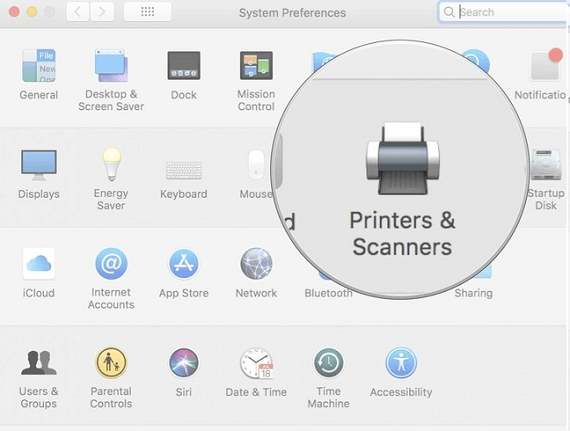
- Next, tap on the ‘Apple Menu’ and click on ‘System and Preference’
- Now, from the next screen, select ‘Printers and Scanners’ option.
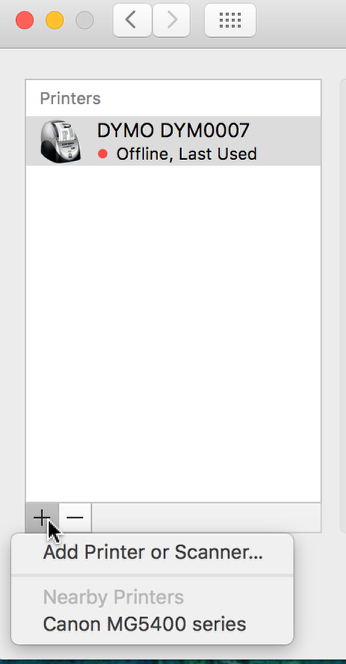
- Thereafter, from the next screen, select ‘+’ sign from the left bottom corner. Now select your printer from the drop down list.
- Wait for few moments to get the connection well established.
- Finally, now you can use your printer as your Canon mx492 wireless printer setup on MAC has been completed.
Final Words–
The steps given in this article will assist you in installing your Canon Pixma MX492 wireless printer setup for Windows and Mac OS.
However, if you are still not able to to setup your printer then feel free to contact us via our live chat.
